
Morning! welcome to virtualcloudblog.com and thanks for checking it out. Today, I’ll try to explain how to create a new WebApp from Azure portal.
Let’s log in into the Azure WebPortal with your credentials.
Steps:
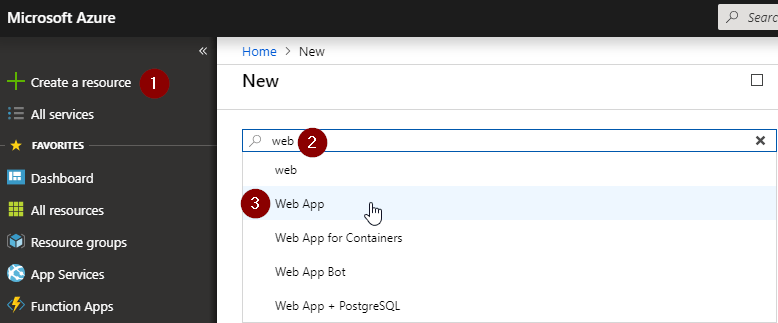
There are multiple ways to create a WebApp from Azure portal, so let go to
Create a resource — type “web” — and select “Web App” from the combo.
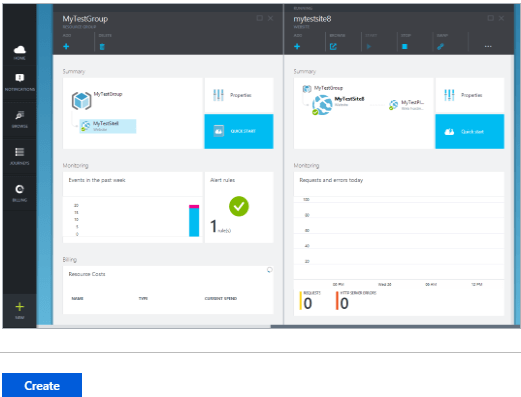
From the wizard, select Create.
App name must be unique across all Azure, (because azurewebsites.net domian is used to identify your “app”)
Resource Group: you can create a new resource group (in advance rs) or choose an existing from the list, in my case, a new rs is created.
OS: in my case Windows
App Service plan: I’ll create a new App Service plan, to reduce as much as possible the cost. So enter the plan name and the location. My new WebApp will be used (mainly for EMEA and in concrete for UK people)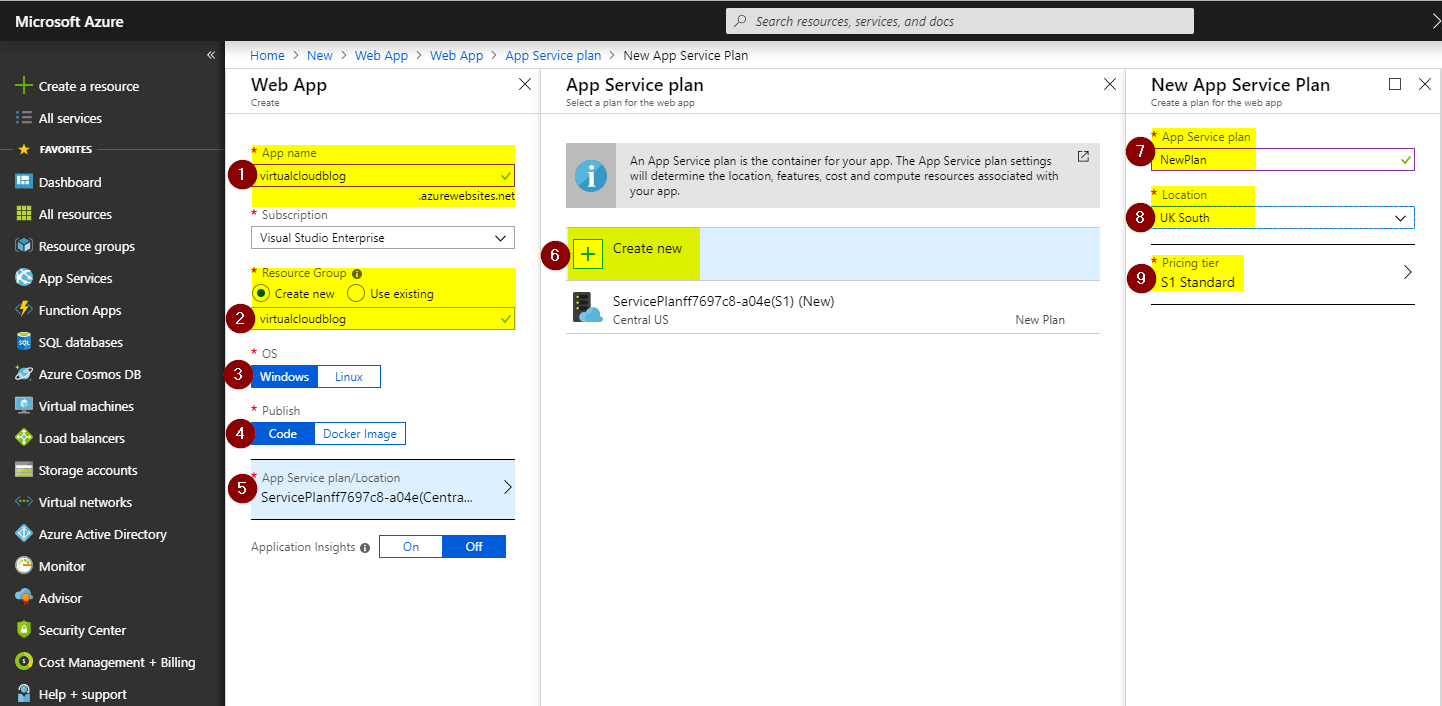
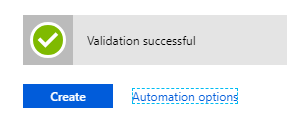
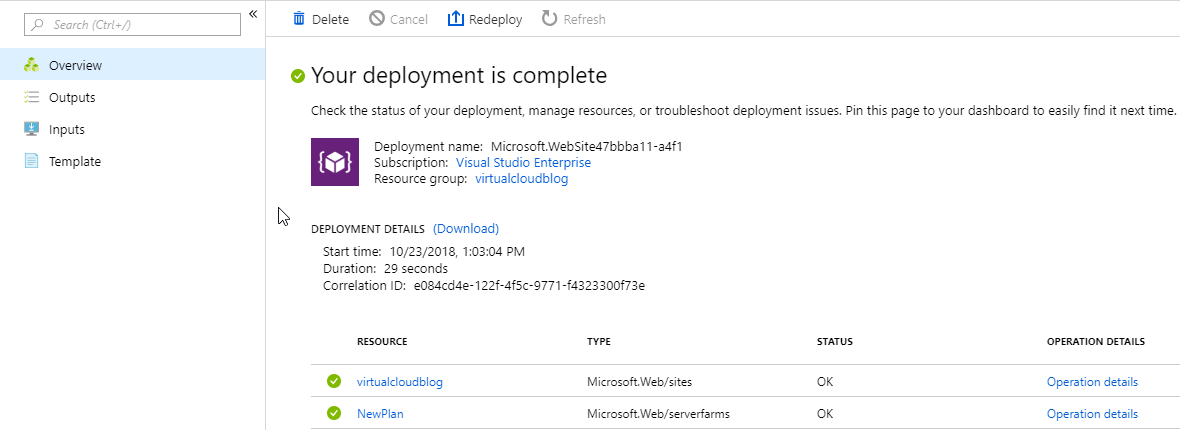
After click OK, a validation green check mark is displayed. From here you can donwload the WebApp steps
Go to the upper right side of the screen, the belt displays the deployment, and clicking in deployment in progress, will see a lot of information about how the deployment is done.

We have a lot of info such as when the deployment is started, the rs, the subscription, the duration, etc…..
Great! the WebApp server has been deployed, easy! Now let’s go to “All resources” and here we can see the new Webapp we have just deployed.
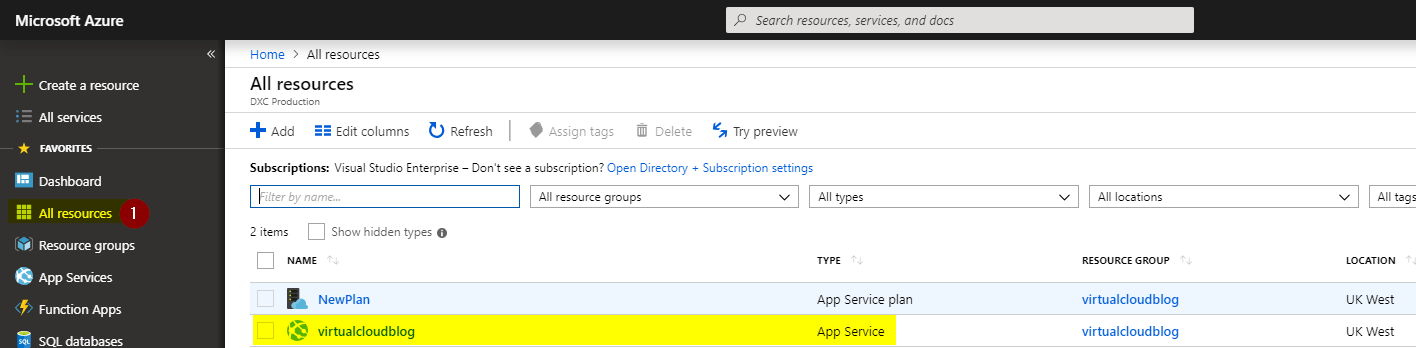
Click the instance, and we have two options to deploy the app,

Using the Quickstart guide (ASP, JAVA, Node.js, PHP or Python) or using deployment options such as: 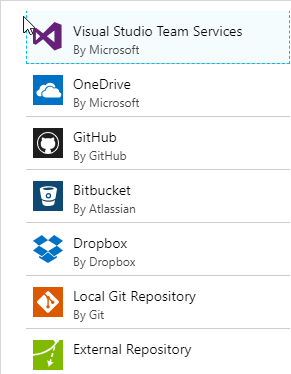
Done!!!
Thanks for share it!!