
First of all,
welcome to virtualcloudblog.com and thanks for checking it out. Today, I’ll show you how to upgrade VMware DAta Protection 6.1 to 6.1.7. which was released 20 February, 2018.
New release includes the following VMware and Restores issues:
VMware Issues
- Support for routed / NAT / Firewall / IDS / TSNR between the vSphere Data Protection appliance and vCenter Server. (1292848)When configuring the network for the vSphere Data Protection appliance and vCenter Server, modifying network address information using NAT or other configuration methods (for example: firewall, IDS, or TSNR) is not supported. When those tools are deployed as part of the virtual network, some vSphere Data Protection functionality may not work as designed.
- Powering On a virtual machine fails when the backed up virtual machine was connected to DVS and restored to other ESXi. (222475)When powering on a virtual machine after you restore it, vCenter Server returns a PowerOnFailure error similar to the following:
DRS cannot find a host to power on or migrate the virtual machine. Network interface 'Network adapter 1' uses network '77 d3 02 50 5f 76 ca d7-db f9 42 6c 0f 6f 87 1f', which is not accessibleThis error message occurs when the environment where you restore the virtual machine does not have the network connection that was present when you backed up the virtual machine. For instance, a user backs up a virtual machine that is connected to a distributed vSwitch. Then the user restores the virtual machine to an ESXi host that is part of a Distributed Resource Scheduler (DRS) cluster. The vSwitch does not exist in the DRS cluster. Powering on the virtual machine, therefore, fails.WorkaroundEdit the virtual machine settings, set the network connection to the network adaptor, and then power on the virtual machine. - The VM MAC conflict alarm appears after you restore a virtual machine to an alternate location. (1588177)After you successfully restore a virtual machine that either vCenter Server 6.0 P2 or vCenter Server 6.0 U2 manages, to an alternate location, the VM MAC conflict alarm appears on vCenter Server though the MAC address has changed during the restore.WorkaroundAcknowledge the alarm and clear it.
- If the name of the data store that you have selected to restore contains either non-ASCII characters or high-ASCII characters, the restore operation fails. (1755102)WorkaroundEnsure that the name of the data store does not contain either non-ASCII characters or high-ASCII characters.
- If the vCenter Server password contains either non-ASCII characters or high-ASCII characters, you cannot create a storage. (1755156)WorkaroundEnsure that the vCenter Server password does not contain either non-ASCII characters or high-ASCII characters.
Restore Issues
- If a virtual machine is deleted during a vSphere Data Protection restore operation, the virtual machine is not properly removed from the vSphere Data Protection inventory. This causes an error when editing the backup jobs that included the deleted virtual machine as source. Additionally, if a virtual machine is created with the same name, attempts to add the virtual machine to a backup job will fail. (35110)WorkaroundAs a best practice, avoid deleting virtual machines during restore operations. If this error does occur, create the virtual machine with a new name and add it to a new backup job.
- File Level Restore (FLR): “Error 10007: Miscellaneous error” is displayed for most of the FLR failures. (45699)The “Error 10007: Miscellaneous error” message is displayed for most of the FLR failures. In addition, FLR does not display any error message in cases where there is a restore failure due to the disk being full or a long file path. Therefore, it is impossible to determine the root cause of the FLR failure.
- Deleted disks are skipped when restoring to original location. (53004)If the target virtual machine no longer has the same disk footprint as the original virtual machine that was backed up (if the disks have been removed or deleted from the virtual machine), performing a “Restore to original location” operation, after selecting a restore point timestamp in the Restore pane, will silently fail to restore the missing disk of the virtual machine.WorkaroundRestore the disk to its original location after manually adding the missing disk to the virtual machine. Ensure the disk is the same size as it was when the virtual machine was backed up. If this workaround fails, restore the disk to a new location to create a new virtual machine. When the restore task completes, detach the restored disks from the new virtual machine and attach them to the required virtual machine using the information in “Detaching and Reattaching Storage” of the vSphere Data Protection Administration Guide.
- Canceling a restore operation does not delete the restored data on a virtual machine. (237125)While performing a restore to a different virtual machine that is not the source virtual machine, if you cancel the operation, the cancellation succeeds, but the already restored data that is part of the canceled restore is not deleted from the virtual machine.
- Restoring to the same source location on a virtual machine by selecting the Restore along with configuration option fails. (237015)If the source virtual disks are removed on a virtual machine, and you restore the same virtual disks to the same source location on the virtual machine by selecting the Restore along with configuration option, the operation fails.WorkaroundPerform the restore to an alternate location.
- You cannot restore an image backup to a new virtual machine if you have included physical Raw Device Mapping (RDM) disks in the backup. (267439)If you back up a virtual machine that has both virtual disks and physical RDM disks, the backup successfully processes the virtual disks only. You can restore the backed up data to only either the source virtual machine or redirect it to another (already existing) virtual machine. Because the backup does not process the physical RDM disks, you cannot restore the data that is present on the physical RDM disks. So, you cannot restore an image backup to a new virtual machine
Steps to perform the Upgrade:
- Log in to the vSphere Data Protection configuration interface.
- Take a VDP snapshot.
- Open a Web browser and go to the following URL. https://yourvSphereDataProtectionServer:8543/vdp-configure/
- Log in using your root / password
- Mount the upgrade .iso file to the vSphere Data Protection appliance. (it might take some time)
- On the Configuration tab, verify that all the services are running. If all of the services are not running, the upgrade might fail.

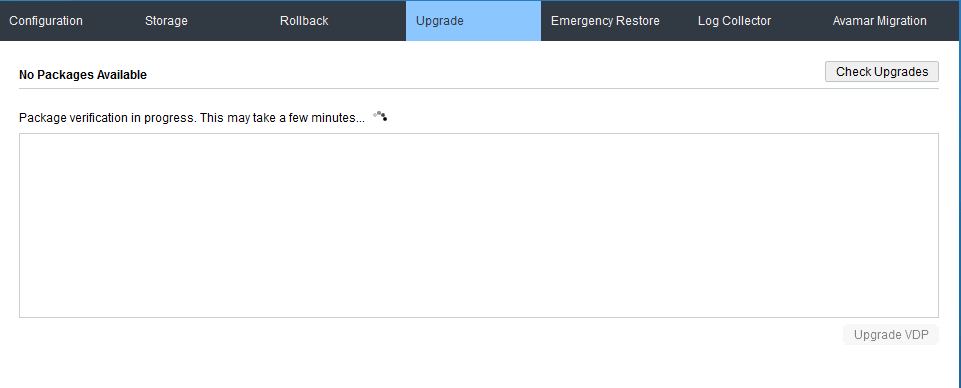
- Click the Upgrade tab.
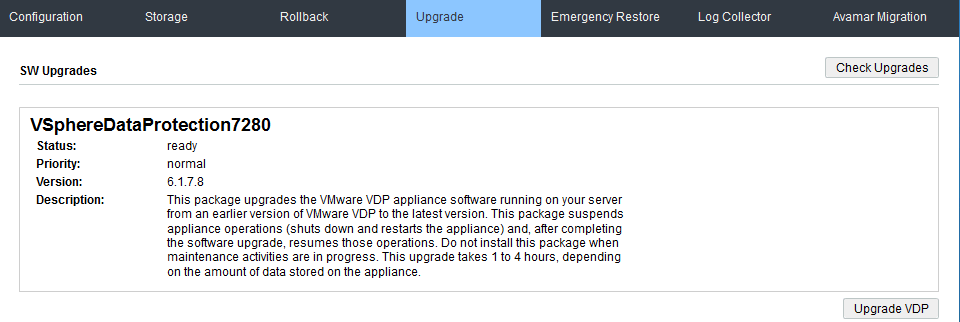
- The upgrades that are available on the upgrade ISO image you mounted appear in the SW Upgrades panel.
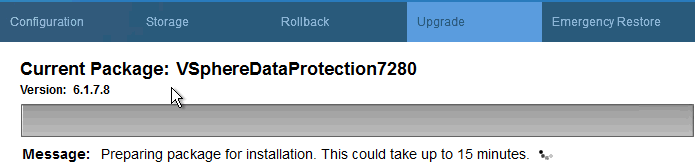
- Select the upgrade you want to install and click Upgrade VDP.
- The upgrade will take some time.
- Delete the snapshot.
Here the Official Release Notes